Link your Cloudflare firewall rules to CraftingStore
When you use Cloudflare for your domain, and you receive an attack, traffic may leak to us (we see rates above 10.000 requests per second). This causes our load balancers to reject all traffic to your website, because you are above our threshold.
We can automatically manage some firewall rules for your store domain. We will not touch anything else, and only need access to "Firewall Services" and "Zone WAF". So no account access, DNS access, etc.
We will create two rules by default (one at the "Custom" section, and a global rate-limiting rule) and update it when required. Please do not modify it manually, that will cause issues. We can do things like; Enabling "Under attack mode" for specific countries, or create specific rules to stop common attacks. These will only affect the store, never any of your other websites.
Rate Limiting: The rate limiting rule that we'll create will affect the whole domain (any website you proxy though Cloudflare). You can disable it from our dashboard after it was created under [ Settings -> Domain ]. After turning it off there, you are free to remove the rule from the cloudflare dashboard under WAF -> Rate limiting. We will not re-enable it from our end.
Note: Make sure that your Cloudflare domain is active, your key won't be valid if it still "Pending". So make sure you complete that before following this article.
1. Go to your Cloudflare account, and open the API section:
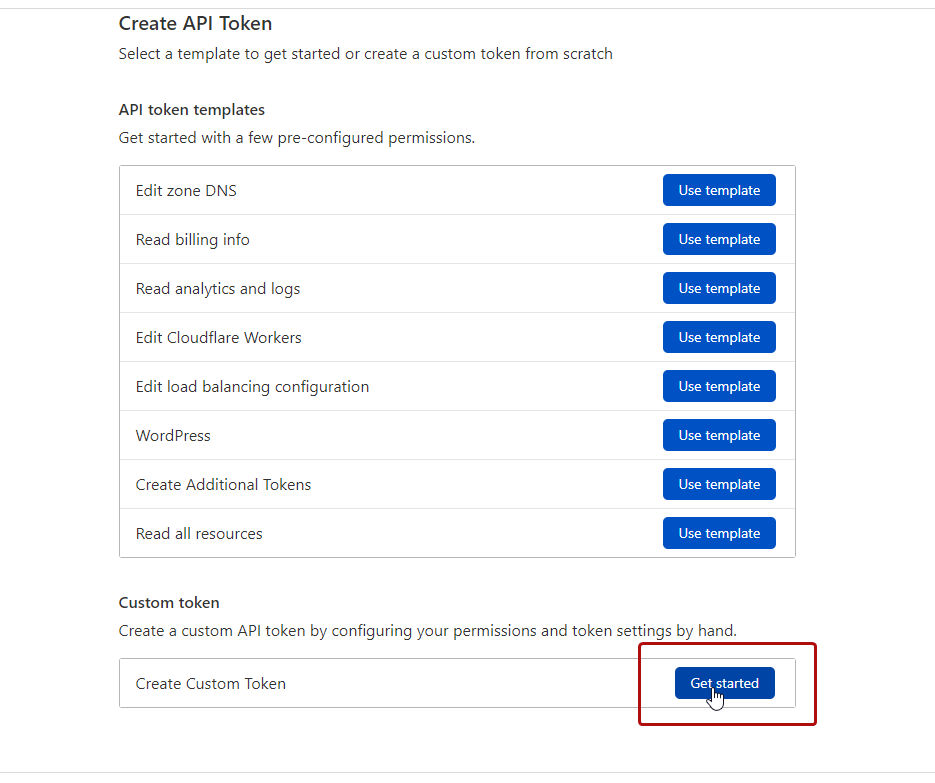
2. Go to the create token page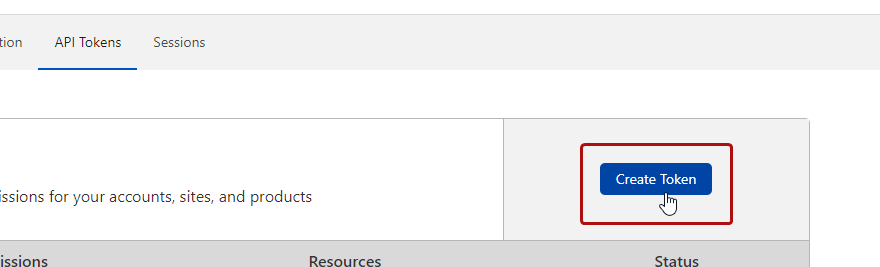
3. Create a custom token by clicking "Get Started".
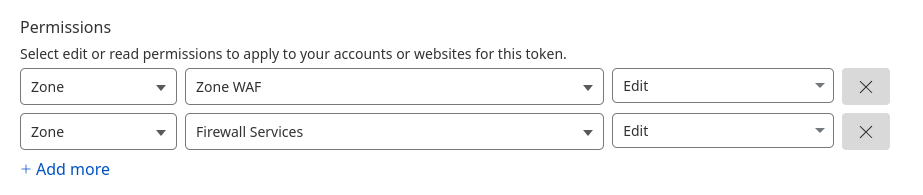
4. Create the following specifications:
> Token name: Give it any name you like, we recommend you name it something like "CraftingStore".
> Permissions:
Make sure to add both permissions (zone WAF & Firewall Services). Otherwise your token will not be valid.
> Zone Resources:
Select the domain that the store will be running on.

> Client IP address Filtering: Leave as-is
Leave the IP filter section as-is, do not try to click anything here, because you cannot go back after making a change.

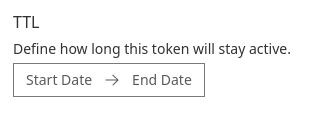
> TTL: Leave as-is
5. Click "Continue to summary"
6. Click "Create token"
7. Take the token, and copy it into the page at [ Settings -> Domain ] and hit the save button
8. Done!